Sunday, October 11, 2009

Book Review: The Book Thief

A couple of weeks ago, I joined a book club! I am so excited about this and I was practically waiting on my tip-toes the 5 days that it took my first three books to get here from Amazon.com. I had never heard of any of the books that I was about to read, but I was sure that it was going to be enjoyable.
I am used to reading fantasy books and I really enjoy them. Some of my favorite books are The Lord of the Rings Trilogy, Harry Potter, The Wheel of Time, and the Mistborn Trilogy. Those are usually the type of books that I seek out.

When I heard the title of this, The Book Thief, I imagined a story about a mischievious child that goes about stealing books, which is kind of what this book is, but I imagined it to be much more mischievious and much more lighthearted. I wondered to myself while waiting for the book what we could possibly talk about in our book club if the book was so basic. I opened the book and with the first couple of words, I was enticed, captivated, and very reluctant to set it down. Usually I can read through books really fast, and I was decently fast with this one, but I needed to make sure that each word sunk in.

About The Book:
Liesel Meminger is only nine years old when she is taken to live with the Hubermanns, a foster family, on Himmel Street in Molching, germany, in the late 1930s. She arrives with few possessions, but among them is The Grave Digger's Handbook, a book she stole from her brother's burial place. During the years that Liesel lives with the Hubermanns, Hitler becomes more powerful, life on Himmel Street becomes more fearful, and Liesel becomes a full-fledged book thief. She rescues books from Nazi book-burnings and steals from the library of the mayor. Liesel is illiterate when she steals her first book, but Hans Hubermann uses her prized books to teach her to read. This is a story of courage, friendship, love, survival, death, and grief. This is Liesel's life on Himmel Street, told from Dealth's point of view.

This is my favorite excerpt.

They say that war is death's best friend, but I must offer you a different point of view on that one. To me, war is like the new boss who expects the impossible. He stands over your shoulder repeating one thing incessantly: "Get it done, get it done." So you work harder. You get the job done. The boss, however, does not thank you. He asks for more.

Read it. You won't be sorry that you did.

Thursday, August 6, 2009

GREAT NEWS!

After 5 months of looking and 4 miserable months working at Walmart.... I got a job!!!!

You are now reading from a Health Unit Coordinator for Intermountain Healthcare. I'm working in the Medical/Surgical unit. No, this isn't EXACTLY what I wanted since I trained to be a Medical Transcriptionist, but in this day where everybody is looking for experience and I couldn't get anyone to hire a new graduate... I thought it couldn't hurt to apply for a position that required knowledge of Medical Terminology and organizational skills. ALL THE MAKINGS OF A GOOD MT.

I may not be there yet, but I know I'm one BIG step closer.

YAY!

I spent all morning yesterday getting poked and prodded. Drug tests, blood draws to check my immunizations, and a Tetanus shot. BUT I'M SO HAPPY.

Look at me go! :-P

Monday, August 3, 2009

My Very First

I have decided that I need to start my transformation into a Homemaker now before I have kids so that when I have a little tot cruising around that I'll be able to keep up with it then too. I have 3 projects so far that I want to show you guys and I'm really excited because 2 of them were taken from something I saw and I tweaked them a bit and made them mine!
My sister-in-law, Maria just moved out-of-state with her husband and baby so her husband could start law school. I wanted to make something that would be fashionable and remind her that Emi and I care and that we think about them all the time. I decided that I wanted to make them a throw blanket and 4 pillows. I mulled over this for about a month before I finally bought the fabric. You see, I've sewn once in my life. It was in a Home-Ec class in 7th grade. I made a drawstring bag and I obviously couldn't sew a straight line to save my life. UNFORTUNATELY, this is still a work in progress.
My mom is an amazing sewer. She made all of my formals for High School dances and my bridesmaid dresses for my wedding. Not to mention the countless things she has fixed or hemmed for me. In short, she is amazing. She is teaching me how to sew and is helping me to make sure I don't screw up these projects too badly... :-D. She is also letting me use her 41-year-old sewing machine! I am going to be buying one here shortly though. I promise to post pics of that momentous moment. :-P

Here are the action shots from our sewing and the finished project. Pretty homey, if I do say so myself... and I DO!
Gianina

Friday, July 31, 2009

I used to be sane, but I got better.

Hello everyone!

I know this abrupt change came as a surprise to a lot of people and it will probably take awhile for people to trickle over and I'll probably have to start building my followers all over again, but hey! I am EXCITED about this change. I have been stagnating over in the cooking world for a little while. Don't get me wrong! I still love it and I still hope to play a major part in it, but I think I might have some other things to offer as well.
Like I said in my previous post, I need a creative outlet. I can only post so many craft, painting, sewing projects on my family blog before people start getting bored and wonder why I don't talk about my hubby more. I started writing a journal and that didn't turn out to be enough. My husband is going bonkers because I keep telling him all about blankets, changing pads, curtains, blah blah blah that I want to share so instead YOU (lucky you...) get to hear all about it.
One of the first things I want to change from my previous blog is I want to add a playlist on here. I know some people despise these things and for that, I am terribly sorry. HOWEVER, music is very much a part of my life! So scroll on down to the very bottom and get to know me a bit by looking at my musical choices.

Hope you enjoy!

Gianina

Wednesday, July 29, 2009

I Need a Creative Outlet.

I think I am going to change the purpose of this blog. I am interested in so many things and want to do so many things and I would love to share all of these things with many people. (I also consequently am not paying very close attention to my grammar.)
I want to make this blog respresent me. I'm still planning on posting recipes (which I have like 5 I need to post btw) but I would also like to post book reviews, movie reviews, crafts I want to do, crafts I've done... etc. and get feedback on all of it. This may not make a lot of sense to some people, but it makes a lot of sense to me, because that is how my mind works 99% of the time. One big jumbled mess of life.
I don't promise that it will be interesting, but I do promise it will be me.

What do you think?

Thursday, June 18, 2009

Greek Potato Salad

If you ever are wondering what I'm doing on a Friday night when my husband is still at work, you can be sure to find me searching the internet for yet another food blog so that I can expand my cooking horizons. I found this blog a couple of weeks ago and I LOVE it. My brother has been begging me to make her Chicken Pineapple Blackbean Enchiladas for him and I have her another recipe of hers on the menu for this next week. Thanks to Mindi for having such an awesome blog!

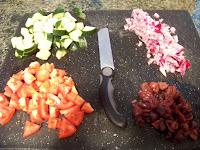
I was hesitant and excited to try this greek potato salad. I was unsure of whether or not Emi or I would like it because we are kind of potato salad snobs. :-D I loved cutting up all the vegetables and the delicious smells that came from them. Nothing smells better than fresh cut vegetables... seriously... nothing. However, this recipe wasn't mine and Emi's cup of tea. We weren't sure why exactly. We didn't hate it, and we didn't love it. I wanted to share it though because I'm sure other people would find it to their liking. My mom tried some and she loved it! I gave it to her and she said that she even ate some right before she went to bed! Haha. So if your game, definitely try this recipe. Who knows.... you might like it!

GREEK POTATO SALAD
1 ½ lb. red potatoes, cubed
1 C. cherry tomatoes, halved
1 C. cucumber, seeded, diced
½ C. pitted Calamata olives, sliced
¼ C. red onion, diced
1 T. chopped fresh oregano
1 C. shredded grilled chicken (optional)

VINAIGRETTE
½ C. feta cheese, crumbled
1/3 C. fresh lemon juice
¼ C. olive oil
2 T. plain yogurt (or Greek yogurt)
1 t. sugar
Salt & Pepper to taste

1. Boil potatoes in salted water until tender, 12-15 minutes; drain.
2. Mix all the ingredients for the vinaigrette in a blender.
3. Combine tomatoes, cucumber, olives, onions and oregano.
4. Add potatoes, chicken and vinaigrette.
5. Lightly mix until vinaigrette is evenly distributed.
6. Chill the refrigerator before serving.

Source: Mindika Moments

Wednesday, June 17, 2009

Steak Kabobs

I have really been enjoying being able to cook on the grill. This last meal I cooked was completely by myself with no help from Emi and the steak ended up being cooked perfect!!! It still had a bit of red in it and was moist and flavorful. I changed this just a little bit from the orginal recipe. For one thing, I used 2 garlic cloves instead of just the 1 and Emi and I never use hot sauce, so I didn't want to buy any for 1/8 of a tsp. Plus, I was a little afraid that if Emi saw the hot sauce, he wouldn't even try the steak, although I'm sure 1/8 of a teaspoon wouldn't add any heat to it. Instead I added 2 T of teriyaki sauce. It turned out great!!! My vegetables of choice were red onions and green bell peppers.

STEAK KABOBS
1/3 cup lemon juice
2 T oil
2 tsp Worcestershire sauce
1 tsp paprika
2 cloves minced garlic
1/2 tsp sugar
1/2 tsp salt
2 T teriyaki sauce
3/4 lb steak- cubed
veggies of choice (like onion, mushrooms, peppers)

Combine first 9 ingredients. Pour 1/4 cup in a large zip loc bag. Cover and refrigerate remaining liquid. Add beef to bag and marinate at least 2 hours. Put meat and veggies of choice on skewers (soak skewers in water for 20 minutes before putting meat and veggies on them so they don't burn). Grill until desired doneness brushing with reserved liquid.

Source: Tried and True Cooking With Heidi

Wednesday, June 10, 2009

Sausage Calzones

Here is another wonderful recipe from Annie's Eats. My husband just LOVED this and told me to make them again soon! These were really easy to put together and satisfied my pizza craving that I always have! (I always crave pizza or tex-mexican food. :-D) I didn't have all the ingredients that I needed so I played around with it a bit and it turned out great!
However, I'm just going to include Annie's recipe because how I wish I had had everything I needed because I bet it would have been even better. I didn't have mushrooms or spinach so I left out the mushrooms (sad day) and put in some fresh parsley instead of spinach (obviously not as much). I have a little pot of parsley that is growing nicely on our balcony that was just begging me to use it. I also added the tomato sauce to the calzone before I put it in the oven! Yum!


Check out Annie's Eats Sausage Calzone recipe here.

Tuesday, June 9, 2009

How to Grill Pizza

Hello Again!

So I'm giving myself 100% for my efforts on blogging this past week. :-D I'm pretty much caught up now and I need to find some more recipes to grace you all with.

Since its pretty much summertime, we are doing most things on the grill. I am not a fan of cooking things over the stove because I always worry that it isn't done, and dislike cooking with oil. Last week, I decided that I wanted to try cooking pizza on the grill. I had never done this before and I was SOOOO nervous. My husband was even more nervous that I was going to ruin his precious grill. :-D

I could not for the life of me find a good tutorial on cooking pizza on the grill. So... I read a couple of different things and just decided to go for it! And here is my tutorial for you. :-D

1. Oil down grill. To do this, pour some olive oil onto a paper towel and rub down the area you will cook on.
2. Turn on grill and put it on high heat. Mine was at 500 degrees by the time I was ready to put the pizza on.
3. Make pizza dough. Lightly brush pizza dough with olive oil. Once dough is ready, place it on the grill. It will start to bubble immediately. Turn grill down to low heat. Once it is puffed up, you know to turn it on it's other side. (You may want to use two spatulas or a pizza turner. I made my pizzas kind of small since I don't have another grill spatula or a special pizza one!)
4. Start adding your pizza sauce and toppings.
5. Close the lid and allow cheese to melt. Once melted, your pizza is done!

SUPER EASY... and I didn't ruin the grill!

Here are some pizza recipes you can try on the grill.

Chicken Barbeque Pizza (This is the one pictured above)
Chicken Garlic Pizza
Ranch Chicken Pizza

...or you could always go for good ol' pepperoni and cheese!

Source: Gianina

Saturday, June 6, 2009

Chicken with Lemon Sauce

This was another meal that me and my mom put together for a get together at my parent's house. My mom did most of the work, but I provided the recipe from Delectable Dining.
This dish turned out amazing and was so creamy. My only advice would be... make sure that you cool the sauce a bit before you taste it. I tasted the sauce and couldn't taste the lemon so I added more and it was a bit overpowering. I will definitely make this again!

CHICKEN WITH LEMON SAUCE
4-6 boneless, skinless chicken breasts
1 cup all purpose flour, divided
3/4 cup grated Parmesan cheese
3 teaspoons salt, divided
1 1/2 teaspoons pepper, divided
2 eggs
5 tablespoons butter, divided
2 tablespoons olive oil
2 1/2 cups chicken broth
1 1/2 cups apple juice
3 tablespoons lemon juice
3 tablespoons minced fresh parsley

Flatten chicken to 1/4-inch thickness. In a shallow bowl, combine 3/4 cup flour, Parmesan cheese, 2 teaspoons salt and 1 teaspoon pepper. In another bowl, beat the eggs. Dip chicken into eggs and coat with flour mixture. In a large skillet, cook chicken in 2 tablespoons butter and oil over medium heat for 3-5 minutes on each side or until juices run clear. Remove and keep warm. In a small bowl, combine the remaining flour, salt and pepper; stir in broth until smooth. Add apple juice to the skillet, stirring to loosen any browned bits. Stir broth mixture and add to the pan. Bring to a boil; cook and stir for 1-2 minutes or until thickened and bubbly. Stir in lemon juice; cook for 1 minute. Add parsley and remaining butter; cook and stir until butter is melted. Serve over chicken.

Source: Delectable Dining

Friday, June 5, 2009

Sausage and Spinach Stuffed Shells

I am a BIG fan of Annie's blog over at Annie's Eats. I probably have more than half of her blog bookmarked to try. I really think she is an amazing cooker/baker.
I have made stuffed shells before, and while I liked them, I kind of found that I felt they were too much trouble for what their worth. These, however, were not. These were AMAZING! By far my favorite stuffed shell recipe. If you try anything from Annie's blog... TRY THESE.

SAUSAGE AND SPINACH STUFFED SHELLS
1 12-oz. package jumbo pasta shells
1 tbsp. olive oil
1 cup yellow onion, finely chopped
1 lb. Italian sausage, casings removed
3 cloves garlic, minced
1 large egg, lightly beaten
1 15-oz. container ricotta cheese
6-7 oz. fresh spinach, chopped OR 10 oz. frozen chopped spinach, thawed and drained
1 cup freshly grated Parmesan cheese, divided
1 tbsp. chopped fresh basil or 1 tsp. dried basil
1/4 cup bread crumbs
1/2 tsp. salt
1/2 tsp. pepper
1 28-oz. can chopped tomatoes with herbs, including the liquid

Directions:
Bring a large pot of salted water to boil. Cook pasta shells according to package directions. Drain, rinse with cold water, and set aside.

Heat olive oil in a large skillet over medium-high heat. Add the onions and cook until softened, about 5 minutes. Add the sausage to the pan, breaking it into smaller pieces as it cooks. Cook until the sausage is completely cooked through and no pink remains, about 5 minutes. Add the garlic and cook until fragrant, about 30 seconds. Remove from the heat.

In a large mixing bowl, combine the egg, ricotta, spinach, 1/2 cup of the Parmesan, basil, bread crumbs, salt, and pepper. Stir together to combine. Add the cooked sausage mixture to the bowl and stir until evenly mixed.

Preheat the oven to 375 degrees F. Spread a thin layer of the chopped tomatoes in the baking dishes (either three 8×8″ pans, or one 9×13″ and one 8×8″). Stuff each shell with some of the sausage and cheese mixture, and arrange in the baking dishes, open side up. Spread the remaining tomatoes over the top of the pasta shells.

Cover the pans with foil and bake for 30 minutes, until hot and bubbling. Remove foil and sprinkle with remaining Parmesan cheese. Bake, uncovered, for 10 more minutes.

Source: Annie's Eats

Thursday, June 4, 2009

Creamy Ground Turkey Enchiladas

This is a Gianina original. I had some ground turkey left over from the tacos that I made so I decided to throw together some enchiladas. These turned out great and were simple and easy to make. My husband kept telling EVERYONE how I came up with my own enchilada recipe and that it was SOOOOO good. :-P

GROUND TURKEY ENCHILADAS
2 T olive oil
1 lb ground turkey
1/2 onion, chopped
Garlic powder, to taste
1 can cream of mushroom
8 oz sour cream
1 can green chile enchilada sauce
2 cups medium cheddar cheese
10 flour tortillas
Cooking spray

1. Preheat oven to 350 degrees.
2. Heat oil in skillet. Add onions and sautee. Brown ground turkey with garlic powder.
3. Put ground turkey in a bowl and set aside.
4. In same skillet, add cream of mushroom, sour cream, and green enchilada sauce. Stir until well mixed.
5. Pour 1/3 of the sauce over the ground turkey.
6. Place meat and cheese inside flour tortillas and roll up. Spray a 9 X 13 baking pan with cooking spray. Place seamside down. Pour remaining sauce over the top of enchiladas. Top with cheese.
7. Bake in preheated oven for 30 - 35 minutes.

We like ours extra crispy so we do the full 35 minutes.

Wednesday, June 3, 2009

Ground Turkey Tacos

I am really behind on my blogging so I have quite a few recipes ready to go. My husband has been on vacation and while we have been eating well... I've been too busy spending time with him to post.
I got this recipe from a new site I was referred to by a friend a couple of weeks ago. Gina at Skinny Weight Watcher Recipes has a lot of great recipes and I was so excited to try this one. I have cooked with ground turkey before... and the result was not the greatest, but I'm happy to report that this turned out well! I was also a little afraid they would be too spicy for my husband, but they tasted almost exactly like the store bought packet of taco seasoning minus all the extra sodium!

GROUND TURKEY TACOS
1.3 lbs 99% lean ground turkey
1 tsp garlic powder
1 tsp cumin
1 tsp salt
1 tsp chili powder
1 tsp paprika
1/2 tsp oregano
1/2 small onion, minced
2 tbsp bell pepper, minced
3/4 cup water
1/2 8 oz can tomato sauce
8 large lettuce leaves from Iceberg lettuce

Brown turkey in a large skillet. When no longer pink add dry seasoning and mix well. Add onion, pepper, water and tomato sauce and cover. Simmer on low for about 20 minutes.
We tried these in the lettuce wraps, but despite drying them the end result was pretty messy (as well as tasty) so we decided to go with the traditional tortilla after that.

Source: Skinny Weight Watcher Recipes

Thursday, May 21, 2009

Jessica's Italian Pasta Salad

Hello everyone! I made these awesome 7 Up Chicken Fajitas a couple of nights ago changing them up just a bit with tomatoes and lettuce instead of sauteed green peppers and onions. While thinking of the recipe I suddenly had an epiphany of what I wanted to go with them. Our friend Jessica makes some awesome pasta salad. I immediately texted her to ask her what was in her pasta salad and I anxiously waited for dinnertime to come around. This is a REALLY simple side dish and its SURE not to dissappoint. Perfect for a wonderful Memorial Day BBQ. I'm thinking on Memorial Day I will switch it up a bit and use Cheese-filled Tortellini pasta. Yum!
Emi was so funny as I was making this. I was cutting up the green bell pepper and he wanted me to give him half of it to eat before I ruined it by cooking it. :-P Once I told him I didn't plan on cooking the green bell pepper, he shut right up and just waited for dinner. :-D

JESSICA'S ITALIAN PASTA SALAD
1 lb Rotini Pasta (I used Garden Rotini which had tomato and spinach pasta as well as the regular, it made for a pretty dish.)
1 green bell pepper
4 roma tomatoes
3 stalks green onions
sliced black olives (I use the smallest can possible because I'm not a fan, but it is GOOD in the salad)
Salt to taste
Kraft Zesty Italian Dressing to taste (I probably used about 3/4 to 1 cup)

1. Cook pasta according to package directions.
2. Drain pasta and rinse under cold water.
3. Cut green bell pepper, roma tomatoes, and green onions into small bits. Add these and sliced olives in with pasta. Add salt to taste and coat with Italian dressing.
4. Allow to chill to desired temperature.
Source: Our good friend Jessica.

Tuesday, May 19, 2009

Sun-dried Tomato Chicken Roll-Ups

I've made this recipe one other time for my Mom's birthday last year. We really enjoyed it so I thought I'd make it again and include a picture. It turned out great! This looks like a really fancy dish, but I assure you it is quick and easy to throw together... anyone can do it.
I usually have a hard time with chicken breasts that are cooked in the oven coming out dry. It isn't the case with these roll-ups. They always come out nice and moist. I did, however, cook my chicken for about 35 minutes. I love the flavor from the sun-dried tomatoes in this dish and I actually hate sun-dried tomatoes... go figure.
Don't you love that I put things in my food that I hate? I just love experimenting and seeing if I like things different ways... and "they" say that your tastes change every 7 years so its good to always give things a try again.

SUN-DRIED TOMATO CHICKEN ROLL-UPS
2 large eggs, lightly beaten
1 cup seasoned bread crumbs
1 1/2 cups ricotta cheese
1 cup oil-packed sun-dried tomatoes, drained and chopped
8 chicken breast cutlets (1 1/2 pounds)
1/2 lb. deli-sliced provolone cheese
1/4 cup Extra Virgin Olive Oil

DIRECTIONS
Position a rack in the upper third of the oven and preheat to 400 degrees. Cover a rimmed baking sheet with foil and grease the foil.
Place the beaten eggs and bread crumbs into separate shallow bowls. In another bowl, mix the ricotta and sun-dried tomatoes. Dip the chicken cutlets into the egg, then coat with the bread crumbs and place on a work surface. Place a slice of provolone and a heaping tbsp. of ricotta mixture on each cutlet. Roll up and secure with toothpicks.
Place the chicken roll-ups side by side on the prepared baking sheet and drizzle with the olive oil. Bake until the chicken is golden and the cheese is bubbling, about 20 minutes.

Wednesday, May 6, 2009

Crockpot: Orange Chicken

My husband loves almost every recipe that I make. He loves them so much that recently he has began getting upset after a particularly good meal because he doesn't know when he is going to have it again. :-D So I've decided that now at least once a month I will cook something old in with all the new. This month, however, I decided that I wanted to do a whole month of recipes we've ate before... but I just couldn't take it so I did add in 3 new ones. So, you will get a couple of recipes that I have posted about before refreshed in your memory, as well as pictures to go along with them to entice you to try them.
I have been making this dish for about a year and a half now. It is really easy and one of the reasons I like it so much is it is done in the crockpot. This is also a low-cal recipe which makes it extra nice. It's a fantastic dish, so you should definitely give it a try. This dish is from Fix It and Forget It Lightly by Phyllis Pelman Good. I use my rice cooker to make rice while I am mixing up the mandarin sauce so it all goes together so nicely.

ORANGE CHICKEN LEG QUARTERS
170 calories per serving.
4 chicken drumsticks, skin removed*
4 chicken thighs, skin removed
1 c. strips of green and red bell peppers (I just use green)
1/2 c. chicken broth
1/2 c. prepared orange juice
1/2 c. ketchup
2 T. soy sauce
1 T. molasses
1 T. prepared mustard
1/2 t. garlic salt
11-oz can mandarin oranges
2 t. cornstarch
1 c. frozen peas
2 green onions, sliced

1. Place chicken in slow cooker. Top with pepper strips.
2. Combine broth, juice, ketchup, soy sauce, molasses, mustard, and garlic salt. Pour over chicken.
3. Cover. Cook on low 5-6 hours.
4. Remove chicken and vegetables from slow cooker into a ovensafe pan. Heat broiler to high and broil for 4 minutes. Keep warm. (The broiling part is optional, Emi and I just like our chicken's outside to be a bit crispy.)
5. Measure out 1 cup of cooking sauce. Put in saucepan and bring to boil.
6. Drain oranges, reserving 1 Tbsp. juice. Stir cornstarch into reserved juice. Add to boiling sauce in pan.
7. Add peas to sauce and cook, stirring 2-3 minutes until sauce thickens and peas are warm. Stir in oranges.
8. Arrange chicken pieces on platter of cooked white rice, fried cellophane noodles, or lo mein noodles. Pour orange sauce over chicken and rice or noodles. Top with sliced green onions.

Saturday, May 2, 2009

Beef Parmesan with Garlic Pasta and Peasant Bread

I have posted about this recipe before, but I wanted to post about it again since its way back in the archives and I didn't take a picture last time. This dish is DEFINATELY worth making. I have now made this dish 3 times and each time its just been absolutely amazing. I made this for my sister-in-law Maria for her birthday. I gave her a choice of three separate meals and she ended up picking this one. It was a big hit and my husband is especially fond of the garlic pasta.
You can see the original post here.

BEEF PARMESAN WITH GARLIC PASTA
1 1/2 pounds beef cube steak
1 onion, sliced into thin rings
1 green bell pepper, sliced in rings
1 cup Italian seasoned bread crumbs
1/2 cup grated Parmesan cheese
4 tablespoons olive oil
1 (16 ounce) jar spaghetti sauce
1/2 cup shredded mozzarella cheese
12 ounces angel hair pasta
8 garlic cloves
1/4 cup parsley

1.Preheat oven to 350 degrees F (175 degrees C).
2.Cut cube steak into serving size pieces. Coat meat with the bread crumbs and parmesan cheese. Heat 2 tablespoons of olive oil in a large frying pan, and saute 4 minced garlic cloves for 3 minutes. Quick fry (brown quickly on both sides) meat. Place meat in a casserole baking dish, slightly overlapping edges. Place onion rings and peppers on top of meat, and pour marinara sauce over all.
3.Bake at 350 degrees F (175 degrees C) for 30 to 45 minutes, depending on the thickness of the meat. Sprinkle mozzarella over meat and leave in the oven till bubbly.
4. While pasta is boiling, heat 2 tablespoons of olive oil in a frying pan and saute 4 minced garlic cloves until golden brown. Take off the heat and add parsley to the pan. Set aside until pasta is done.
4.Boil pasta al dente. Drain, and toss in olive oil, parsley, and garlic. Top with grated parmesan. Serve meat and sauce atop a mound of pasta!

HINT: make the meat ahead of time, and refrigerate over night, the acid in the tomato sauce will tenderize the meat even more. If you do this, save the mozzarella till the last minute.

With this I made a recipe that I've had sitting in my favorites probably for the last six months or so. I had never made it before because I was afraid if my husband saw this lump of dough that he would stick up his nose and not want to try it. He LOVED this bread and told me to make it ANYTIME and since it is REALLY easy... maybe I will!

PEASANT BREAD
1 pkg dry yeast
2 cups warm water
1 Tbsp sugar
2 tsp salt
4 cups flour
Cornmeal
Melted butter

Place yeast, water, sugar, and salt in bowl and stir until dissolved. Add flour and stir until well blended. Do not knead. Cover and let rise until double in size (about 1 hour). Remove dough from bowl and place in 2 rounds on a greased cookie sheet sprinkled with cornmeal. Let rise an additional hour. Brush top on dough with melted butter and bake at 425 degrees for 10 minutes. Reduce oven temperature to 375 degrees and cook for an additional 15 minutes. Serve warm.

Monday, April 27, 2009

Chicken Barbeque Pizza

I made this on Saturday night as an impromptu visit from my parents. I knew Emi wasn't going to be home when I got home from work so I gave them a call and bribed them with food.
I have been planning to make BBQ pizza for the last 3 months and have just never gotten around to it. I've been trying to find a recipe that I thought would be amazing since I love BBQ chicken, but I was afraid that on a pizza it would just be too strong of a taste. I came up with this concoction myself. :-D This is the best BBQ pizza I have ever had. Emi and my parents would agree with me.
You can find the original pizza dough recipe here, but I've made a few changes.

PIZZA DOUGH
1 pkg. Dry yeast (2 tsp. = 1 pkg.)
2 Tbsp. Lukewarm water
Dissolve yeast in warm water.
1 egg
1 tsp. Salt
½ tsp. Sugar
1 Tbsp. Shortening or oil
1 cup boiling water
3 cups flour
1 tsp. Italian seasoning
1 tsp. parsley flakes

Beat egg, add shortening, salt, sugar. Slowly stir in boiling water. Cool to lukewarm and add yeast mixture. Add ½ flour, italian seasoning, and parsley; stir (or beat with electric mixer) until smooth. Add remaining flour. Knead to soft dough. Roll to fit pan. Spread light coating of oil over dough on pan. Let rise 15 minutes. (You can spread on sauce and toppings while waiting for dough to rise.)

Cook at 425 for 15 - 20 minutes. (Check at 15 minutes.)

HINT WHILE BAKING: Turn oven to BROIL for one minute at the very end of pizza cooking time. This gives the cheese a nice brown that is so delicious!

BARBEQUE CHICKEN PIZZA
3 boneless, skinless chicken breasts cubed
Italian seasoning
Parsley flakes
Worchestershire sauce
Salt
Pepper
1/2 cup Sweet Baby Ray's BBQ sauce (or your preferred)
1/4 cup heavy cream
1/4 red onion, sliced
Mozzarella cheese
1 T. olive oil
1 T. fresh cilantro chopped

Cube chicken breasts and saute over medium-high heat seasoning with italian seasoning, parsley flakes, worchestershire sauce, salt and pepper to taste. Mix BBQ sauce and cream together and spread over crust. Top with chicken, then cheese, then red onion slices.

Creamy Ranch Chicken Enchiladas

Yesterday was mine and my husband's 2-year anniversary. We had a really great night watching our wedding video and just remembering April 26, 2007. It was just a small celebration, nothing too fancy because we're going to be going out to dinner later in the week. Emi and I both love enchiladas! I have two other enchilada recipes that I swear by and now I'm going to have to add these to the list.
I was very intrigued by this recipe because I just couldn't imagine eating an enchilada with ranch and I was a little scared to even try it, but that is why I ended up trying it anyway! :-D I definitely reccomend these. I made a couple of small changes, which I'll include below. Yum!
I found these on another blog that I found recently (don't you just LOVE finding new food blogs???) called Annie's Eats. I have over 30 recipes marked to try from this blog so be sure to check it out here.

CREAMY RANCH CHICKEN ENCHILADAS
4-6 boneless, skinless chicken breasts (I used 2 bone-in chicken breasts and had more than enough to fill 10 tortillas.)
8 oz. reduced fat sour cream
8 oz. Ranch salad dressing
2 stalks green onions
1- 7 oz can green chiles
flour tortillas (10-15)
shredded mexican cheese

Directions:
Cook chicken breasts by preferred cooking method until cooked through. Set aside to cool a bit. (I cooked mine by throwing them in the crockpot for 6 hours with the green chiles, salt, and pepper. I love cooking chicken this way for anything I need shredded chicken for. It's much easier to shred than baking, grilling, or boiling.)

While chicken is cooling, mix up the sauce. In a large mixing bowl, combine half of the sour cream and half of the Ranch dressing. In a small bowl, combine the rest of the sour cream and Ranch dressing. Stir both until well combined. Shred or chop the cooked chicken and add to the large mixing bowl. Mix well with sauce.

Preheat the oven to 375°. Grease a 9 x 13″ pan (and possibly another, smaller pan if needed). Add some of the chicken mixture to the center of the each tortilla. Sprinkle with shredded cheese, to taste. Roll up tortilla and place, seam side down, in the prepared baking dish. Use the sauce in the small bowl to top enchiladas, spreading well. Sprinkle on cheese to taste.

Bake in preheated oven for 25-30 minutes (30 for a crispier tortilla). Allow to cool a few minutes before serving.

Sunday, April 26, 2009

Roasted Red Pepper Pasta

I made this dish last Sunday when we went up to my parent's house to have my mom cut Emi's hair. My mom never misses an opportunity for me to cook for them. :-D
I got this recipe from a new blog I found a couple of weeks ago and I have quite a few more recipes to try from her blog. Be sure to check out Norah's blog here. This recipe turned out so good! I will definitely make it again once red peppers go on sale! :-D The only thing I did differently is that I added the parmesan to the sauce and let it melt in instead of just using it as a topping.
Side note on the picture: My mom took this picture and she wanted some "green" on there so she stuck her salad bowl next to the pasta on the plate. I told her it would look goofy, but she is just too cute to listen to me. :-D

ROASTED RED PEPPER PASTA
3 red bell peppers
2 tablespoons pine nuts (optional)
1/2 medium onion, finely diced
3 cloves garlic, minced
1/2 cup heavy cream
Flat leaf parsley, finely minced
Fresh Parmesan, shaved or grated
1/2 to 1 pound pasta: orecchiette, penne, fusilli, etc.

Roast red peppers, then place in a Ziploc bag to allow to sweat. Peel the charred skins from the peppers, then removed seeds. Set aside. (Here are instructions for roasting bell peppers.)
Lightly toast pine nuts in a skillet. Set aside.
Puree peppers with pine nuts. Set aside.
Cook pasta according to package directions.
In a skillet or pot over medium heat, drizzle in olive oil. Add diced onions and garlic and cook until soft. Pour in pepper puree and stir together. Add plenty of salt. Pour in cream and parmesan cheese. Stir to combine. Taste and add more salt, if necessary. Add cooked pasta, then stir together.

Sunday, April 19, 2009

Bacon Wrapped Chicken

This dish turned out amazing! I was a little worried about it since I am not a huge fan of cream of chicken. In fact, I almost used cream of mushroom instead, but I am very glad that I didn't! My husband and his friend Cody said that this dish was better than anything you could ever get at Olive Garden and said that I need to make this again. To me, the chicken actually took a back seat to the sauce this time which is weird in this family of meat lovers. I made a couple of changes to the recipe, which I'll include below. I want to make this again and next time I think I will skip the bacon wrapped chicken all together and do something a little more like this, but definitely keep the same sauce recipe.
One little piece of advice to those who want to try this recipe with the bacon wrapped chicken, you might want to slightly cook the bacon in the microwave or very briefly over the stove. Since the bacon in covered by the sauce, it cooks but it is still really soft when it comes out of the oven.

BACON WRAPPED CHICKEN
4 skinless, boneless chicken breast halves
1 (8 ounce) package cream cheese, sliced
1 pkg bacon
3 stalks green onions
6 cloves garlic, minced
1 (10.75 ounce) can condensed cream of chicken soup
1/2 cup mayonnaise
1/2 cup heavy cream
1 Tablespoon lemon juice
Salt and pepper to taste
1/2 pound wide egg noodles

DIRECTIONS
1. Preheat oven to 325 degrees F (165 degrees C).
2. Pound the chicken breasts until flat. Put a slice of cream cheese, 1 teaspoon chopped green onions, and 1 teaspoon minced garlic in the middle of each breast and roll up. Wrap each rolled breast with 2 slices of bacon and secure with toothpicks. Place in a 9x13 inch baking dish.
3. In a medium bowl, combine cream of chicken, mayonnaise, heavy cream, lemon juice, leftover green onions, 2 Tablespoons of garlic, pepper and salt. Mix until smooth, then pour over chicken (I also added the cream cheese I had leftover from the slices for the chicken).
4. Bake in the preheated oven for 1 hour, or until no longer pink and juices run clear. Turn on broiler for 4 minutes to get a nice crispy top.
5. Serve chicken and sauce over egg noodles.

Wednesday, April 15, 2009

Flautas

You will have to excuse me for my lack of updating and commenting lately. I just recently started a new job and I will need a little while to get used to the change. Speaking of jobs... I wouldn't usually do this, but I really dislike the place that I am currently working, mostly because I just graduated from a school and I'm not even doing what I went there for. If any of the people that read this site have any connections with Medical Transcription, I'd really appreciate any help that I can get. I have been trying to find a job in that field (since I went to school for it) but it is tough right now because of a lot of graduates and companies aren't hiring because of the economy. Any help/advice would be much appreciated.
Anyway! Back to food. When I saw Real Mom Kitchen's recipe for Chicken Flautas, I knew I needed to give it a try. I hit one little snag in that my deep fryer is too small for the tortillas. I remembered seeing on For the love of cooking that she baked her taquitos in the oven so I combined these forces :-D and came out with an awesome meal!
Immediately following my husband's first bite, he explained to me that he didn't expect to like these, but that he ended up LOVING them and told me I could make them anytime! :-D

FLAUTAS
Please click on the above links to check out the original recipes
3 chicken breasts
1 Tbsp. Fajitas Seasoning
1 tsp. garlic salt
1 small can chopped green chiles
10 flour tortillas
1 cup shredded cheese (whatever you like, I used cheddar)
toppings of your choice to dip them in such as salsa, guacamole, etc. (I used the green enchilada sauce mixed with sour cream. Next time I'd like to dip them in this.)

Place your chicken in a crock pot with the fajita seasoning and garlic salt and cook on low for at least 6 hours. About 1 hour before you want to eat, remove chicken from the crock pot. Shred the chicken and allow to cool for about 30 minutes. Then mix in shredded cheese.

Preheat the oven to 425 degrees. Put flour tortillas for 1-2 minutes in the microwave to soften. Place a bit shredded chicken on the side of the tortilla then roll. Place, seam side down, on a baking sheet that's been coated with cooking spray. Finish rolling the rest of the flautas, then spray each of them with cooking spray and bake for 5-6 minutes then turn over and cook for an additional 5-6 minutes or until crispy and golden brown.

I served this with sour cream rice. This ended up being REALLY good! I changed it slightly to make it a little more tasty. I will definately make it again!

SOUR CREAM RICE
2 cups rice, cooked
1 tsp salt
1/2 T. garlic powder
2 cups sour cream
1 cup grated monterey jack cheese or any soft white cheese
3 cups grated cheddar cheese
1 (4 ounce) can chopped green chilies, no seeds or 1/2 cup chopped fresh chili pepper, no seeds

While cooking rice, season with salt and garlic powder. Mix cooked rice, sour cream and green chiles. Mix grated cheeses together and reserve 1 cup for topping. Stir in cheeses with rice/sour cream mixture. Pour rice mixture into a lightly greased casserole dish. Top with reserved 1 cup grated cheese. Bake at 350 degrees F. for 30 minutes.

Wednesday, April 8, 2009

Crispy Herb Baked Chicken

I made this easy dish last night for Emi and I. It was a quick put together, but tantalizing wait while the smell of the chicken drifted through the house. I added a few things to the original recipe and I'm glad I did. After coating the chicken, I sprinkled the rest of the breadcrumb/potato flake mixture over the top of the chicken for extra crispyness. This was very crispy and the taste was fantastic, almost like fried chicken. Yum.
The only thing I would do differently is next time I will flip the chicken over halfway through the cooking. The bottom of the chicken had a nice crust while the top was still a little flaky. Emi loved this dish and told me I could make it again... anytime.
I chose to serve this with vermicelli and marinara sauce, kind of like a chicken parmesan thing. Like I've said before... I have never made my own marinara sauce and I am SURE that I am missing out. I (guiltily) use the jars from the store, but I usually add additional spices to make it WABAM a little better. Last night I used Prego Roasted Parmesan and to that I added some sugar, italian seasoning, garlic powder, salt, pepper, and little bit of red pepper flakes. Emi likes his sauces creamy so I also added a can of cream of mushroom to the sauce. Yum.

CRISPY HERB BAKED CHICKEN
4-6 bone-in chicken thighs or drumsticks
2/3 cup dry potato flakes
1/3 cup Italian seasoned bread crumbs
1/3 cup grated Parmesan cheese
1 teaspoon garlic salt
1 teaspoon paprika
1/2 teaspoon pepper
1/3 cup butter, melted

DIRECTIONS
1. Heat oven to 375 degrees F (190 degrees C). Grease or line with foil a baking sheet or a 13 x 9 inch baking pan.
2. In a medium bowl, combine potato flakes, Parmesan cheese, and garlic salt. Stir until well mixed.
3. Dip chicken pieces into melted butter or margarine, and roll in potato flake mixture to coat. Place in prepared pan.
4. Bake for 45 to 60 minutes, or until chicken is tender and golden brown.

Monday, April 6, 2009

Wisconsin Cauliflower Soup

I have had my eye on this recipe for the past couple of months, but had never gotten around to making it. A couple of months ago, my parents took Emi and I to Zupas. It is a restaurant that serves soups, salads, and sandwiches and they seem to be sprouting up all over the place now. This wasn't my first experience with Zupas, but it was my husband's and he LOVED it.
My dad's favorite soup is the Wisconsin Califlower Soup, so I was really excited when I found this copy cat recipe. I've never tried it so I didn't know whether the taste was right or not, but my family really liked the soup. We had a couple of setbacks since my mom accidently picked up a mild cheddar cheese and monteray jack with jalapenos instead of pepper jack, but it all turned out in the end. :-D
Good thing I made it because *hopefully* (crosses fingers) last night will be one of the last cold days this season, but it is Utah afterall and we all know how Utah's weather can change.

ZUPAS WISCONSIN CAULIFLOWER SOUP
2 tablespoons margarine or butter (1/4 stick)
1 medium onion, chopped
1/4 cup all-purpose flour
1/2 teaspoon salt
2 cups milk
1 can (13 3/4 to 14 1/2 ounces) chicken broth
1 head (2 1/2 pounds) cauliflower, cut into 1-inch pieces
1 teaspoon Dijon mustard
1 cup Sharp Cheddar cheese
1 cup Pepper Jack cheese

In 4-quart saucepan, melt margarine or butter over medium heat. Add onion and cook until golden, about 10 minutes, stirring occasionally. Stir in flour and salt; cook 2minutes, stirring frequently. Gradually stir in milk, chicken broth, and 1 1/2 cups water; add cauliflower and heat to boiling over high heat. Reduce heat to low; cover and simmer until cauliflower is tender, about 10 minutes. In blender (with center part of blender cover removed to allow steam to escape), blend cauliflower mixture at low speed in small batches until very smooth. Return cauliflower mixture to saucepan; heat over medium heat until hot, stirring occasionally. Remove saucepan from heat; stir in mustard and 1 1/2 cups cheese until melted and smooth. Garnish soup with remaining cheese to serve.

Monday, March 30, 2009

Lemon Cream Pasta & Roasted Parmesan Asparagus

I think this is my favorite dish that I have ever made. I am not a huge fan of pasta, but rather a huge fan of pasta with sauce. This just turned out so amazing. It had the exact right consistency and flavor. It turned out to be a very creamy pasta with just a little hint of lemon.
I did things a bit differently than the original recipe and I'll include my changes here. As always these measurements serve as a guide rather than what I actually put in.

LEMON CREAM PASTA WITH CHICKEN
3 skinless, boneless chicken breast halves
1 lemon, quartered
2 teaspoons garlic powder, divided
1 teaspoon ground black pepper, divided
4 (14.5 ounce) cans chicken broth (or 4 chicken cubes with boiling water)
1/4 cup fresh lemon juice
1 (16 ounce) package rotelle pasta
1 cup heavy cream
3/4 cup parmesan cheese
1 teaspoon grated lemon zest

1. Heat a small amount of oil in a pan. Cut chicken into cubes and sautee over medium-high heat. Squeeze lemon over chicken and season with 1 1/2 teaspoons garlic powder and 3/4 teaspoon pepper.
2. Meanwhile, in a large saucepan, season the chicken broth with the remaining 1/2 teaspoon garlic powder and 1/4 teaspoon pepper. Bring to a boil and add lemon juice and pasta. Cook over medium heat until done. Drain, reserving a small amount of liquid.
3. Add cream, lemon zest, and parmesan cheese and cook until cheese has melted and cream has thickened.

I served this with asparagus. This was mine and Emi's first encounter with asparagus other than at a restaurant. Afterwards, Emi told me that if I had told him we were going to have asparagus that he probably wouldn't have eaten it. However, he really liked it and requested that I make more as long as I don't make it any other way. I told him that if he liked it one way that I would definitely try other ways.

ROASTED PARMESAN ASPARAGUS
1/2 - 1 lb asparagus spears
1 tbsp olive oil
Salt and pepper to taste
1-2 tbsp shredded Parmesan cheese

Preheat oven to 400 degrees. Spray cooking spray on a tinfoil lined baking sheet. Trim bottoms from asparagus spears & rinse. Place asparagus on baking sheet, salt and pepper to taste and drizzle with olive oil. Top with shredded Parmesan cheese and roast for about 5 minutes until fork tender. Serve & enjoy.

Saturday, March 28, 2009

Lime Chicken Soft Tacos

My camera's batteries have died again and we're in the works of buying some rechargeable ones so bear with me the next little while. I've been using my cell phone for the last couple of posts but when I went to mail the picture to the computer it decided not to work.
This was a really good meal and I did a couple of things to make it a little easier for me. I painted my office with my mom yesterday so I needed to have a simple meal. I'll include what I did for the instructions because to me, it is much easier. It wasn't your usual taco flavor so it was a nice change!

LIME CHICKEN SOFT TACOS
1 1/2 pounds skinless, boneless chicken breast meat, shredded
1/8 cup red wine vinegar
1/2 lime, juiced
1 teaspoon white sugar
1/2 teaspoon salt
1/2 teaspoon ground black pepper
2 green onions, chopped
2 cloves garlic, minced
1 teaspoon dried oregano
10 (6 inch) flour tortillas
1 tomato, diced
1/4 cup shredded lettuce
1/4 cup shredded Monterey Jack cheese
1/4 cup salsa
1/4 cup sour cream

1. Put chicken in crockpot (I put them in frozen). Season with salt and pepper. Add water, chicken broth, or white wine to keep the chicken from burning. Cook for 5-6 hours on low.
2. Saute chicken in a medium saucepan over medium high heat for about 5 minutes. Add vinegar, lime juice, sugar, salt, pepper, green onion, garlic and oregano. Simmer for an extra 10 minutes.
3. Heat an iron skillet over medium heat. Place a tortilla in the pan, warm, and turn over to heat the other side. Repeat with remaining tortillas. Serve lime chicken mixture in warm tortillas topped with tomato, lettuce, cheese, salsa, and sour cream.

I served this with a recipe for Cafe Rio's Cilantro Lime rice. The two flavors combined so well!

CILANTRO-LIME RICE
1 c. uncooked rice (long-grain, white rice)
1 tsp. butter or margarine
2 cloves garlic, minced
1 tsp. freshly squeezed lime juice
1 can (15 oz) chicken broth
1 cup water
1 Tbsp. freshly squeezed lime juice
2 tsp. sugar
3 tablespoons fresh chopped cilantro

In rice cooker combine rice, butter, garlic, 1 tsp. lime, chicken broth and water. Let the rice cooker do it's thing. :-D Remove from heat. In a small bowl combine lime juice, sugar and cilantro. Pour over hot cooked rice and mix in as you fluff the rice.

Also! I received my second award the other day from Nett's Nook! Thank you SOOO much!!!

Along with the award came this little quote:

"These blogs are exceedingly charming. These kind bloggers aim to find and be friends. They are not interested in self-aggrandizement. Our hope is that when the ribbons of these prizes are cut, even more friendships are propagated."

It also says : "Please give more attention to these writers. Deliver this award to eight bloggers who must choose eight more and include this cleverly-written text into the body of their award."

I'd like to give this to:
Lauren at Mixing Bowls and Spatulas
Donna at My Tasty Treasures
Teresa at A Blog About Food
Eniko at It's all about FOOD!

Wednesday, March 25, 2009

Eclair Torte

My friend Brooke brought this over when we had dinner with her last week. Emi and I loved it so much that in the days following it, we were craving it. I decided to make it yesterday. It is a pretty easy recipe to make but a little frustrating that it takes so long!!!! :-D Brooke found it on Real Mom Kitchen.
As I've mentioned before, I'm not a huge fan of chocolate so I didn't put chocolate syrup on mine and I think its just as delicious (if not more so) without it! :-D Be sure to give it a try!

ECLAIR TORTE
1 cup water
½ cup butter (no substitutes)
¼ teaspoon salt
1 cup all purpose flour
4 eggs
1 package (8 ounces) cream cheese, softened
2 packages (3.4 ounces each) instant vanilla pudding mix
3 cups cold milk (I didn't use all 3 cups. I used more like 2 cups)
1 carton (12 ounces) frozen whipped topping, thawed
Chocolate syrup

In a saucepan over medium heat, bring water, butter, and salt to a boil. Add four all at once; stir until a smooth ball forms. Remove from heat; let stand for 5 minutes. Add eggs, one at a time, beating well with a wooden spoon after each addition. Beat until smooth. Spread into a greased 13 x 9 x 2 inch baking pan. Bake at 400 for 30 to 35 minutes or until puffed and golden brown. Cool completely on a wire rack. If desired, remove puff from pan and place on a serving platter.

In a mixing bowl, beat cream cheese, pudding mix, and milk until smooth. (Now if you're not careful doing this you can end up with chunks of cream cheese in the pudding mixture. I beat the cream cheese first. Then add the first cup of milk to it a little at a time. Then add the rest and pudding mix) Spread over puff; refrigerate for 20 minutes. Spread with whipped topping; refrigerate. Drizzle with chocolate syrup just before serving. Refrigerate leftovers. 12 servings.

Monday, March 23, 2009

Lasagna with Creamed Spinach

I got this recipe a couple of weeks ago from my Aunt. My Aunt is a great cook and I remember her cooking all the time growing up. She has a blog that she updates every once in a while that talks about the history behind holidays, usually has some funny stories, and she shares a recipe relating to that holiday. You can check it out here. This turned out great and I will definitely be making it again. For the most part, Emi likes vegetables and doesn't mind when I include them in our dinner, but every once in a while he throws a fuss. He did ask me "what is that green stuff?" when I served him this dish, but he ended up asking when I would make it again by the time he got a mouthful. We had Emi's sister and her husband over for dinner and they really enjoyed it as well. Yum!

CREAMED SPINACH
2 (10 ounce) packages frozen chopped spinach , thawed, drained and squeezed dry
1 cup cottage cheese
1 8-oz package cream cheese
1/2 cup butter, cubed 3 eggs, beaten
1 1/2 cups cubed process American cheese
1/4 cup all-purpose flour 1 teaspoon salt

Lightly grease your crockpot. In a large bowl, mix together the spinach, cottage cheese, cream cheese and butter, American cheese, eggs, flour and salt until everything is evenly distributed. Transfer to the greased slow cooker. Cook on high for one hour, then reduce heat to low and continue cooking for 4 - 5 hours. Use for filling in lasagna, or manicotti shells. Can even be eaten by itself.

You'll find my recipe for lasagna here. Just substitute the cottage cheese, cheddar, and eggs for the creamed spinach.

Saturday, March 21, 2009

Stuffed London Broil

I got this idea from My Tasty Treasures. Unfortunately when I went to the store there wasn't any flank steak to be found, so I picked up a London Broil and hoped for the best. :-D We had one of my very best friends over for dinner last night, and she actually follows the food blog world as much as I do. She was planning to make this dish soon so it was fun to have her over to see how it turned out. I must say I had quite a bit of trouble cutting the steak in half, but it turned out great and everyone really liked it. The roasted red peppers really made the dish in my opinion, giving it a very interesting flavor. My only recommendation would be to use more cheese. Oh, and make it with flank steak instead!! :-D

STUFFED FLANK STEAK
1 Flank Steak 1 1/2 to 2 poinds
1 pkg frozen chopped spinach, thawed
1/2 cup crumbled blue cheese
1 seven ounce jar roasted red peppers, chopped
2 T. seasoned dry bread crumbs
1 egg yolk
3/4 t. garlic salt
3/4 t. ground black pepper
1 T. olive oil

1. Heat oven to 425.
2. Lay steak on work surface. Holding sharp knife parallel to work surface and starting at long side, slice flank steak in half to opposite side, without cutting all the way through. Open up the steak like a book and flatten slightly to an even thickness.
3. Squeeze liquid from spinach and discard liquid. In a medium sized bowl, combine spinach,cheese, peppers bread crumbs, egg yolk, ¼ teaspoon garlic salt, and ¼ teaspoon pepper.
4. Season steak with an additional ¼ teaspoon pepper and garlic salt. Press filling onto steak, leaving a 1 inch border on all sides. Roll up steak to enclose filling, beginning on a short side. The grain of the meat will be running from left to right. Tuck any loose filling back into ends.
5. Tie steak with cotton twine at 2 inch intervals to secure. Rub outside with oil and sprinkle with remaining ¼ teaspoon pepper and garlic salt.
6. Roast at 425 for 35 minutes, then increase heat to broil for 5 minutes, turning once. Let meat rest for 15 minutes. remove twine, slice and serve.

I served this with Crash Hot Potatoes courtesy of For The Love of Cooking.

Wednesday, March 18, 2009

Gnocchi Marinara

My brother works at a really upscale restaurant in Salt Lake City as their accountant. He used to be one of the pickiest eaters, but since starting his job there he seems to like to try almost anything. I've been to the restaurant twice since my brother is so generous (and I mean REALLY generous) and one of the things I tried was Gnocchi. I absolutely loved it. So when I saw a recipe for it on A Catholic Cooks, I knew that I had to give it a try. This didn't turn out quite like a wanted it to but after I got used to the texture, it was at least edible. My brother came down for this momentous occaision and I was really glad because if he hadn't been here, it probably would have turned out worse. He has seen the chefs at the restaurant make this before and has also tried once to make it on his own. So while this wasn't a huge success, I am comforted by the fact that it was better than my brother's attempt so maybe I know a LITTLE more about cooking than he does. :-P
I don't know whether or not I'll try to make this particular recipe again, but I do have a few suggestions for those of you who want to give it a try. First of all, make the gnocchi pretty small. I think part of the reason mine had a gluey texture is because they were so big. Secondly, use a strong sauce. Me, being a little naive, just picked up some Ragu sauce from the store and Gnocchi are pretty bland themselves so you might want to roll out "Your Great Great Great Grandmother's Secret Sauce" for these. ;-) (I'm still in need of some fantastic recipe for marinara sauce, although I admit I've never really tried to make one of the ones I've found.)

GNOCCHI FROM MASHED POTATOES
Leftover Mashed Potatoes
Nutmeg
Sauce of your choice (marinara, alfredo, etc.)

1. To about 4-6 cups of mashed potatoes, add 1 egg, nutmeg as preferred, and 1/2 cup of flour at a time, mix until it has a semi-firm consistency that hold its shape. (About like play dough)
2. Roll out into snakes about 1 inch wide and cut into pieces about 1 inch long.
3. Turn each cut piece onto its side, pressing finger in center to make a well.
4. In a pot of boiling water, with salt and oil added, drop 8-10 gnocchis in. When they float, they are done, drain and serve with your favorite sauce.

I served this with chicken thighs coated in bread crumbs cooked at 350 degrees for 1 hour and 15 minutes.
If you're not going to use leftover mashed potatoes, once you have boiled the potatoes let them sit for a little while in a strainer over the sink to get most of the moisture out. Once you make the mashed potatoes (with milk and butter) let it sit again for a while to dry out. One of the problems my brother had when he made Gnocchi is there was too much moisture so he had to add a lot of flour in order to make it the right consistency. If any of you more seasoned cooks out there have some tips to add they would be greatly appreciated because I was pretty bummed that this was the first thing is months that I failed to WOW on.

My next daring attempt will be at Ricotta Gnocchi.

Sunday, March 15, 2009

Honey Mustard Chicken

Here is another great recipe from My Kitchen Cafe. It does take a little while to cook, but its all done in the oven while you could be off saving the world, or painting your living room like I was doing. The flavor was fantastic even though it was a pretty simple dish. The only recommendation that I would make is to turn your chicken over half way through baking. The bottom part of the chicken that had sat in the sauce was much more flavorful and tender than the top. Next week I will be trying this same recipe with some Tilapia that I bought and I'll be sure to let you know how it turned out. I served this with a baked potato and some green beans. The baked potato was an awesome easy choice since I just coated it in olive oil, salt, and pepper before wrapping it and throwing it in the oven for an hour. They were both done at the same time. Talk about EASY.

HONEY MUSTARD CHICKEN
4 boneless, skinless chicken breasts, thawed and tenderized slightly (if they are overly thick, slice them in half)
1/3 cup butter, melted
1/3 cup honey
2 Tablespoons mustard (I used the basic yellow mustard since my husband is not a fan of Dijon mustard, but I bet it would be tasty with either)
1/4 teaspoon salt

Pre-heat oven to 350. Place chicken in shallow baking pan. In a small bowl, combine butter, honey, mustard and salt and whisk well. Pour over chicken. Bake for 45 minutes to an hour, basting every 15 minutes.

Wednesday, March 11, 2009

Garlic & Ginger Pork Chops

I still have a package of boneless pork ribs in the freezer, so I will probably be making this again very soon and I'll be sure to post a picture then. Our friend Cody who is an avid BBQ lover puts BBQ sauce on almost any meat. I've come to realize that regardless of how I cook or season the meat, he'll put BBQ sauce on it. However, with this meal he didn't use ANY BBQ sauce and he told me that this is his favorite dish that I have ever made. Such high compliments! Emi loved this as well. I got the idea from For the love of cooking but I made a couple of changes. Since we were having our friends Cody and Missy for dinner, I substituted the soy sauce for teriyaki since Cody doesn't like the taste of soy sauce. I also made much more food because these boys like to EAT. :-D

GARLIC & GINGER SAUCE
3 t cornstarch
6 T teriyaki sauce
4-6 cloves garlic, minced
1/2 cup of honey
2 tsp grated fresh gingerroot
1/4 c water
Green onion, diced (for garnish)

In a saucepan, combine cornstarch and soy sauce and mix until it's smooth. Add honey, garlic, ginger, and water then bring to a boil while stirring. Reduce heat and let thicken. The measurements are kind of guessed since I felt like there wasn't enough sauce and added more ingredients as I went. My sauce ended up being pretty sweet (but not too sweet) with little bursts of ginger and garlic flavor.

PORK CHOPS
10 boneless pork ribs
Salt, pepper, garlic powder to taste
1 tsp olive oil
Cooking spray

Meanwhile, in a skillet over medium high heat add olive oil and cooking spray. Season the pork chops to taste. When the pan is hot, add pork ribs and brown the outsides. Remove to an oven-safe baking dish and cook 25-30 minutes or until pork reaches and internal temperature of 170 degrees F. Drizzle sauce over pork then garnish with green onion and serve.

Sunday, March 8, 2009

Lime Meltaways

I found this recipe on Two Peas and Their Pod a couple of days ago and have been desperately trying to find a reason to make them. I love lime and I also love lemon flavored desserts so I was more than a little eager to try this out. Emi and I went over to his sister's house for a delicious dinner and I volunteered to bring these babies. They were a success and I promised my sister-in-law that I would post the recipe. This was pretty easy, but I was a little confused about the two logs that I was supposed to roll the dough into. I just guessed and since they tasted really good and everyone liked them, I'm guessing I did it right. :-D

LIME MELTAWAYS
12 tablespoons (1 1/2 sticks) unsalted butter, room temperature
1 cup powdered sugar
Grated zest of 2 limes (I used 2 ½)
2 tablespoons freshly squeezed lime juice
1 tablespoon pure vanilla extract
1 3/4 cups, plus 2 tablespoons all-purpose flour
2 tablespoons cornstarch
1/4 teaspoon salt

Directions
1. In the bowl of an electric mixer with the whisk attachment, cream butter and 1/3 cup powdered sugar until fluffy. Add lime zest, juice, and vanilla; beat until fluffy.
2. In a medium bowl, whisk together flour, cornstarch, and salt. Add to butter mixture, and beat on low speed until combined.
3. Between two 8 by 12 inch pieces of parchment paper, roll dough into two 1 1/4-inch diameter logs. Chill at least one hour.
4. Heat oven to 350 degrees. Line two baking sheets with parchment paper. Place remaining 2/3 cup powdered sugar in a resealable plastic bag. Remove parchment from logs; slice dough into 1/8-inch thick rounds. Place rounds on baking sheets, spaced 1 inch apart.
5. Bake cookies until barely golden, about 15 minutes. Transfer cookies to a wire rack to cool slightly 8 to 10 minutes. While still warm, place cookies in the sugar-filled bag; toss to coat. Bake or freeze remaining dough. Store baked cookies in an airtight container for up to 2 weeks.

Saturday, March 7, 2009

Creamy Ranch Chicken Pasta

From În Restaurantul Gianinei
I pulled this out of my archives to add a picture to it. But I thought I'd leave my brother's orginal comment on here to convince you all that you should try it. :-D

"Mad props to your ill cookin' skills." -Eric (My Brother)

This was a relatively quick recipe. It had a lot of flavor and had a taste that I can't quite explain. This time around I did things a little differently since I didn't have very much sauce last time. I grabbed two packets of the dry salad mix and used about a pack and a half. I also used 1/2 cup half and half because I wanted the sauce a bit creamier. The result was fantastic and I was rewarded with another. "Woman, this is the best food you've ever made." :-D

CREAMY RANCH CHICKEN PASTA
6 slices bacon
4 skinless, boneless chicken breast halves, cut into bite size pieces
2 tablespoons flour
2 tablespoons ranch dry salad dressing mix
1 cup milk
1/2 cup half and half
3 cups egg noodles or fettucini
3 tablespoon finely shredded Parmesan cheese

1. Start your water for your pasta. Cook noodles according to package directions.
2. Cut bacon into narrow strips, then again into tiny pieces. In a large skillet, cook bacon over medium heat until crisp. Drain bacon on paper towels.
3. In the same skillet, cook chicken until no longer pink, turning to brown evenly. 4. Mix flour, salad dressing mix, and milk in a small bowl. Move chicken into saucepan. Pour flour mixture over chicken. Cook and stir until thickened and bubbly. Cook and stir 1 minute more. Stir in bacon. Serve over noodles.

Monday, March 2, 2009

Korean-Style Pork Tenderloin and MY FIRST AWARD!

A little while ago, I found a new food blog that I have just fallen in love with and you will see quite a few of her recipes popping up on here from now on. It's For the love of cooking. This lady seems like a really talented cook and her recipes are pretty healthy, yet they don't necessarily come off that way. What I mean by that is I can shove one of her recipes in my husband's face and he won't recoil because he thinks its healthy. (Yeah, he is one of THOSE guys - the mention of low-fat, low-sodium, low anything is like a death sentence for him. Don't even get him started on fat-free.) Not only are her recipes healthy, but she provides excellent descriptions of what you need to do, as well as pictures.

The only thing I did differently with this recipe was that I don't own an oven-safe skillet so I switched it into a baking pan after browning it in a skillet. This made the outside so yummy with the flavor just seared right in! It also took longer to cook than what the instructions say. It was probably in the oven for about 30 minutes until my thermometer read at a temperature of 160. I took it out once it hit 170 because that's just how my husband likes it.

I served this over fried rice using the extra sauce for flavor. Yum!

KOREAN-STYLE PORK TENDERLOIN
1/3 cup of low sodium soy sauce
2 tbsp sugar
1 tbsp minced peeled fresh ginger
3 tbsp rice vinegar
1 tbsp dark sesame oil
1/4 tsp crushed red pepper
4 cloves of garlic, minced
1 1/2 lb pork tenderloin, trimmed of fat
Olive oil cooking spray

1. Combine the first 7 ingredients in a large zip lock bag, and add the pork. Seal and marinated in a refrigerator for 8 hours our overnight, turning bag occasionally.
2. Preheat oven to 425 degrees. Heat a large ovenproof skillet coated with cooking spray over medium high heat. Remove pork from bag, reserving marinade. Add pork to pan, cook 6 minutes, browning on all sides. Place pan in oven, and bake at 425 degrees for 15 minutes or until meat thermometer registers 160 degrees (medium) or until desired degree of doneness. Let stand 5 minutes before slicing.
3. Bring reserved marinade to a boil in a small saucepan. Reduce heat, and simmer 5 minutes. Cut pork into 1/4 inch thick slices and drizzle with sauce.


I also received my first award today!!! Teresa from A Blog About Food gave it to me and I am just so excited! Teresa has a lot of yummy recipes on her blog so be sure to head over there!
I will pass this on to:
Melanie at My Kitchen Cafe - I don't think she knows this, but she is the biggest reason I even started my food blog in the first place because of all of her yummy food!
My Aunt at Tale to Teller - She posts about Holidays and usually includes a yummy recipe to try that follows the current holiday. Check it out!

Sunday, March 1, 2009

Pasta With Roasted Garlic Cream Sauce

Sorry it has been so long since I posted last. I really haven't been doing a ton of cooking lately (besides good ol' Mac & Cheese), but I'll make up for it this week. We had this meal tonight and it was delicious. I kept the chicken separate rather than mixing it in with the pasta because I was too lazy to de-bone it before I stuck it in the oven. I seasoned the chicken with salt and pepper and drizzled it with Olive oil and some balsamic vinegar. Yum! I didn't really make too many changes because it was really good the way it was. I do, however, think that next time I will add some green onions to the sauce for that little extra punch of flavor. (Can you tell I LOVE green onions?) I had a little bit of trouble with the sauce being a bit too thick but I think that's because I was trying to do too many things at once and let it boil a bit too long. I just added a bit more milk and we were good to go. I also roasted my garlic different than the original recipe. I'll include the instructions, but I got them here.

Here is my altered recipe:

PASTA WITH ROASTED GARLIC CREAM SAUCE
1 head garlic, roasted
Olive oil
1 cup cream or half & half
1 cup milk
3 tablespoons butter
3 tablespoons flour
2 cloves garlic, minced
2 stalks green onion, chopped
salt and pepper
1/2 cup freshly grated Parmesan cheese, plus more at the table
Red pepper flakes, optional
2 broccoli crowns cut into bite-sized pieces (I used frozen broccoli)
2 chicken thighs
1 lb pasta

Preheat oven to 350 degrees. Slice the top of the head off so every clove of garlic is exposed. Place on a small square of tinfoil (easy clean up). Drizzle with olive oil and salt to taste. Fold edges of tinfoil together and twist to make a sealed bundle (See a picture here). Place in oven and bake for 30-40 minutes depending on the size of the garlic. Remove from oven, let sit about 5 minutes, and then open the tin foil to let the garlic cool. Squeeze to remove the roasted cloves.

In a medium pot over medium-high heat, add butter and once melted, add flour and cook 1 minute. Add cream and milk, whisking to break up any lumps. Add minced garlic, salt and pepper. Bring to just boiling, then reduce heat to low. Add cheese and whisk until smooth.

Once the roasted garlic is cool, squeeze the garlic out of the papery skin. Mash with a fork and add to the cream sauce and whisk together. Add chopped green onions. Cook for about 2 minutes, stirring occasionally. Sprinkle with red pepper flakes.

While the sauce is cooking, cook the pasta according to package directions. About 4 minutes before the pasta is done, add the broccoli. Once cooked, drain and set aside.

Remove skin from chicken thighs. Put in a 9X13 baking dish and drizzle some olive oil and some balsamic vinegar over the top. Season with salt and pepper. Cook at 350 degrees for 45 min -1 hour.

Toss the pasta and broccoli with the sauce. Add more cheese just before serving.
Related Posts Widget for Blogs by LinkWithin